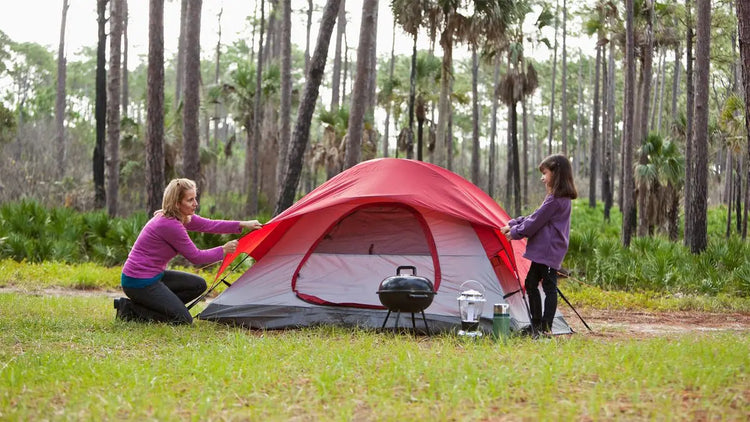
Knowing the art of tent pitching is essential for camping! 🏕️⛺ While tents come in various types, follow these simple steps to pitch any tent.
🌟 Tip: Always set up your tent before your camping trip! Avoid last-minute surprises like rain or wind. Double-check for missing or damaged parts.
1️⃣ Find the Perfect Spot
Campgrounds usually have designated areas, but if you're backcountry camping, choose wisely:
- Safety first: Avoid hazards like dead branches or steep slopes.
- Seek comfort: Look for shaded spots and natural windbreaks.
- Leave No Trace: Respect the environment and fellow campers.
2️⃣ Assess the Ground
Picture this: You settle into your sleeping bag, only to discover an inconvenient slope or a pesky rock beneath you. Don't let that happen! Take these precautions before pitching your tent:
🔍 Examine the terrain: Ensure it's flat and free from any discomfort-causing elements.
⚠️ Watch out for rocks: Remove any potential obstacles that could disrupt your peaceful slumber.
3️⃣ Position the Tent
Different tent types require specific setups. Here are some tips to guide you:
🏞️ Groundsheets: Lay it out first, followed by the tent on top.
🔘 Single-layer tents: Place the tent in your desired spot.
🏕️ Two-layer tents: Start with the inner mesh tent without the fly.
🌟 Tip: Ensure the door faces the right direction before proceeding. If it's windy, stake a few corners of the tent for added support. You can adjust these later.
4️⃣ Set up and Connect the Poles
For tents with pole sleeves, follow these steps:
🔧 Assemble the poles: Put them together according to the manufacturer's instructions.
👉 Slide the poles: Insert the poles into their respective sleeves.
🔗 Attach the ends: Connect the ends of the poles to the corresponding corners or edges of the tent.
Take your time to ensure a secure and stable structure. Let's move on to the next step!
For tents with hooks or clips, follow these steps:
🔧 Assemble the poles: Follow the manufacturer's instructions to assemble the poles.
👉 Insert the poles: Place the ends of the poles in their respective corners or edges. You may need someone to hold the poles up while you do this.
🔗 Attach the hooks or clips: With the poles in an upright position, start by attaching the center hooks or clips over the poles first. Then attach the remaining hooks or clips.
This step may require some assistance, but take your time and ensure everything is secure.
Ring and Pin System:
In some tents, the traditional "ring and pin" system is still used. Follow these steps for this type of setup:
🔩 Insert the pin: Instead of inserting the pin into the ground, insert it inside the hollow end of the pole.
Remember, the purpose of the pin is to secure the pole, not to anchor it to the ground. Keep this in mind as you proceed with the setup.
5️⃣ Add the Rain Fly
If you have a single-layer tent, you can skip this step entirely. For all other tents, follow these steps:
🚪 Locate the door: Find the door on the tent fly.
👉 Place the fly: Toss the fly over the inner tent and pole structure so that the door is in the correct position.
🔗 Attach the fly: Use the buckles or Velcro wraps provided to attach the fly to the corners of the tent and poles.
This extra layer will protect you from the elements, so take care to ensure it's attached securely.
6️⃣ Secure the Tent with Stakes
Follow these steps to secure your tent with stakes:
🔨 Stake out the corners: Begin by staking out the corners of the tent.
🏞️ Secure walls and vestibules: Then, stake out any walls and vestibules.
💡Note: If you're setting up on sand, snow, loose soil, or difficult terrain, you may need to use alternate staking methods.
Make sure each stake is firmly in place to prevent the tent from shifting or collapsing.
7️⃣ Secure the Tent with Guylines
Tent guylines are essential for providing structure and support to your tent. Follow these steps to tie them securely:
🔒 Use an adjustable knot: To achieve optimal tension on the guylines, utilize an adjustable knot such as the tautline hitch.
By using the tautline hitch or a similar knot, you can easily adjust the tension of the guylines, ensuring that they are taut and provide the necessary stability for your tent.
8️⃣ Open the Vents
If your tent is equipped with vents, follow these steps to ensure proper airflow and prevent condensation:
🪟 Locate the vents: Identify the vents on your tent.
🔓 Open the vents: Unzip or unfasten the vents to allow air circulation.
By opening the vents, you promote ventilation inside the tent, reducing the chances of condensation buildup and keeping the air fresh and comfortable.


